How to Make the Tastiest Pour-Over Coffee at Home

Being stuck at home doesn't mean you're stuck without good coffee. We asked baristas if they had any advice for desperate coffee lovers who need a simple way to make delicious coffee at home. We decided to explore the pour-over method as you'll only need a few simple pieces of equipment and the force of gravity to make a stellar-tasting coffee.
What you need
- Your favorite freshly roasted coffee beans
- A pour-over cone
- Cone-shaped paper coffee filter (not needed if using metal mesh pour-over cone)
- Coffee grinder
- Pour-over coffee maker or coffee pot/mug (to drip coffee into during brewing)
- Kettle/hot water
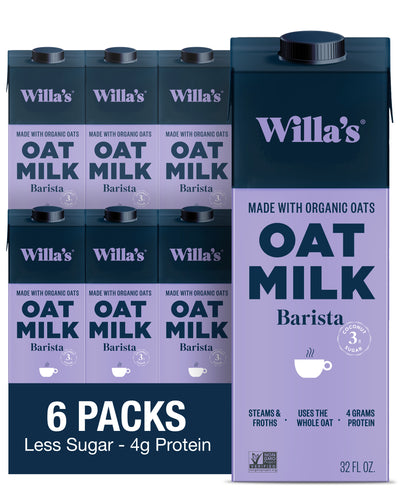
- Willa's Barista Oat Milk
The Pour-Over Method
- Choose your favorite beans
Great tasting coffee starts with great tasting beans. This part is up to your preferences, but we recommend an aromatic, light-bodied coffee as a starting point for the pour-over method. We have been loving Dogwood out of Minneapolis, MN and Parlor Coffee out of Brooklyn, NY. Even if you can’t leave the house, you can still support your local roasters, order coffees online, and try something new!
- Grind your beans into a medium grind
A medium grind works best for the pour-over method. Your coffee grounds should be coarser than espresso grounds, but finer than French press grounds.
- Heat water to 200-210 °F
Heat water to about 200 °F or just before your kettle starts whistling. You can also bring water to boil and let it stand for 10-15 seconds before brewing. We love the gorgeous Kettles from Fellow.
- Set up your pour-over cone
You have a few options for a pour-over cone. The cheapest cones will be made of plastic or ceramic and you will line it with a paper coffee filter every time you brew. There are also metal cones which have a washable screen filter instead of using paper filters. Some cones will act as both a filter and a decanter, like Chemex style cones, while others will need to sit on top of some sort of decanter while brewing.
To prepare the pour-over cone, line your cone with a filter if necessary, and pour some hot water through the filter and cone. This washes the paper filter and heats up the cone to ready it for brewing. This water should be dumped out after it passes through the cone. Then, measure out 1 tablespoon of grounds into the filter for each cup of coffee you want to brew, and place the cone over a coffee pot. If you are only making a single serving and don’t want to create more dishes, you can also place the cone directly over your coffee mug.
- Begin pouring water slowly
Slowly pour hot water into the pour-over cone until the volume of water is about double the volume of coffee grounds. For example, if brewing 1 tablespoon of grounds, start by pouring 2 tablespoons of water. Then, let the coffee soak in this hot water for about 30 seconds to activate the brewing process.
- Add the rest of the water
After the first 30 seconds is up, pour in half of the remaining water and wait another 30 seconds to pour in the rest of the water. Allow the coffee to finish brewing and draining through the cone. The total time from beginning to pour to completing draining should be under 2 minutes. The amount of time the coffee spends brewing correlates to how strong the flavor will be, so if your brew comes out too light or too strong, consider tweaking the amount of grounds, the grind, or water temperature to affect brewing time.
- Enjoy (with Willa’s Oatmilk)
Your cup of pour-over coffee will taste great black, if that’s your preference. Otherwise, Willa’s Oatmilk is a healthier alternative to creamer that doesn’t sacrifice the rich flavor in order to soak in the nutrition of whole oats.
Shop Willa's Barista Oat Milk!
We also asked baristas for their homemade French press secrets.
Want to learn more about why baristas choose Willa’s Oatmilk?